Showing posts with label Campaigns. Show all posts

Friday, April 2, 2010

Campaign Battle Report: Road to Glory Final Battle

It was end times. One final battle remained to determine the ruler of the wasteland. The Ork horde had finally slowed chaos' seemingly relentless advance. Now chaos was regrouping and the Orks were poised to take advantage of their momentary confusion.

Chaos Army List
  • Abaddon (275)
  • Tzeentch Demon Prince with wings, warptime and wind of chaos (205)
  • Marines in Rhino
  • Thousand Sons
  • Defiler (150)
  • Land Raider
Ork Army List
  • Wazdakka (180)
  • Warboss with mega-armor, cybork, bosspole, attack squiq (130)
  • 20 Boyz led by nob with power-klaw and bosspole (160)
  • Trukk with red paint (50)
  • Battle Wagon with deff rolla, armor plates, red paint, big shoota and grott riggers (135)
  • 5 Mega Nobz (200)
  • 5 Nob Bikerz with 3 power-klaws, a painboy, waagh banner, 2 stikk bombs and all Cybork (371)
  • 7 Lootas (105)
  • 5 Deffkoptas (175)
Setup
The final battle of the Road to Glory campaign is Annihilation. Winning the last battle meant that the Orks were able to choose Pitched Battle as the deployment type. Chaos won the dice-off and chose to deploy first and take the first turn.

Turn 1
Chaos started out with a bang and a kerunch. The only movement came from the defiler edging closer to the center of the board. Masssed lascannon fire destroyed the trukk and the defiler's battlecannon landed square on the lootas in cover, killing a couple. On the ork turn, everything moved forward as fast as it could, except the lootaz who stayed in their trees, taking pot shots at the rhino. Wazdakka shot his fancy gun and managed to immoblize the defiler.

Turn 2
The chaos land raider moved back just enough to to stay out of deff-rolla range. The demon prince started to move towards the rhino in anticipation of providing counter-charge support. Chaos shooting results were slim, but a couple of bikes and a deffkopta bit the dust. The orks continued their rush forward, and the lootaz managed to put a wound on the demon prince in the shooting phase.

Turn 3
Now the battle was truly on. The land raider rolled forward and Abaddon and the Thousand Sons got out. The demon prince joined them, and together they shot up, assaulted and killed all the meganobz and their warboss. On their turn, the orks responded in kind. The lootaz and bikes shot at Abaddon, the boyz got out of the wagon and assaulted the thousand sons just as the battlewagon rammed the land raider, destroying it and catching five ork boyz in the ensuing explosion. By the end of the assault round, all the Thousand Sons were dead, and Abaddon had fallen to Wazdakka and the bike nobz in assault.

Turn 4
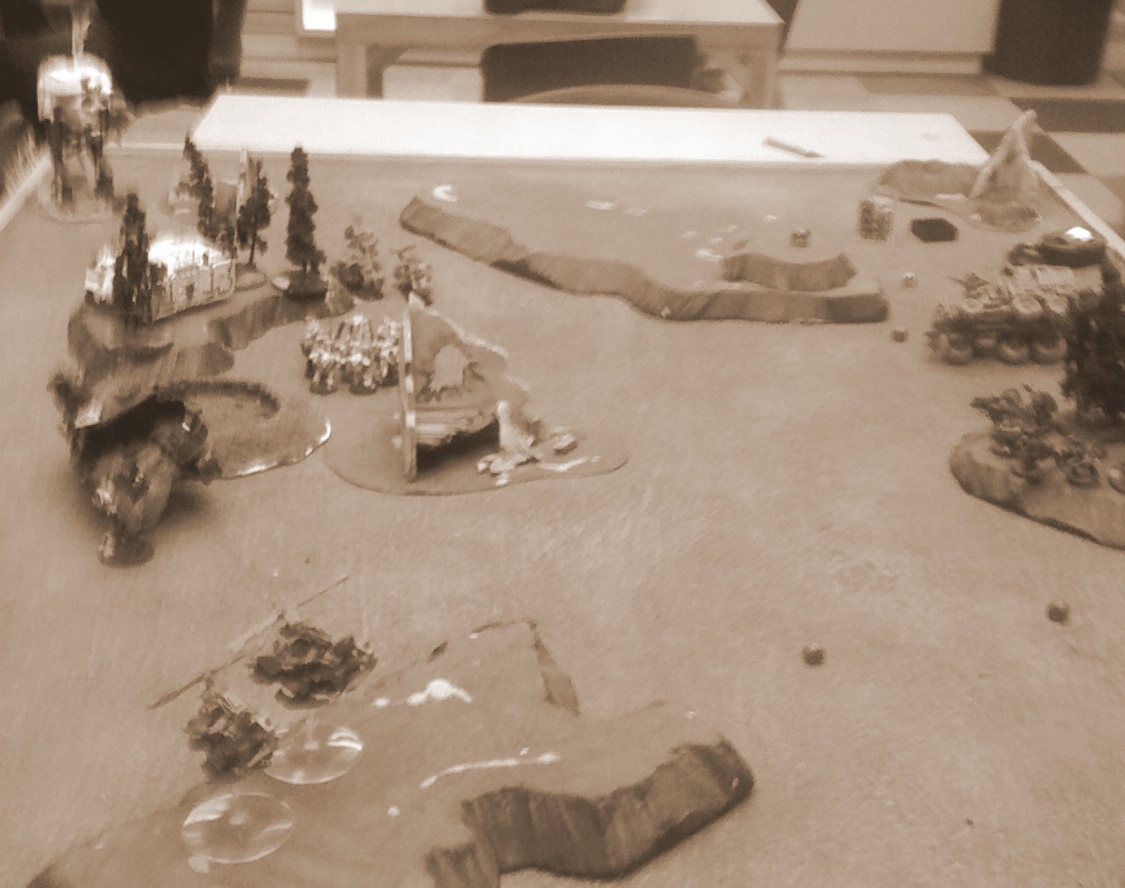
Looking to put the balance back in their favor, the chaos marines piled out of their rhino and assaulted the boyz, killing all but one and the nob. Struck by a bout of insane heroism, the orks stood refused to flee. The Defiler dropped it's battlecannon shell on top of the deffkoptaz, killing two. The demon prince hopped over to the battlewagon and put some hits on it, but didn't manage to do anything more than keep it from shooting the next turn. Still this was enough, because as the battlewagon turned to come about it managed to immobilize itself on the remains of the land raider, making it easy for the demon prince to finish it off in the close combat phase. Wazdakka and the bikerz came to the assistance of the boyz, leaving just two chaos marines fleeing towards the table edge.

Turn 5
With only a few assets left, chaos was looking to pick up whatever victory points it could. The rhino moved away from it's perch, and shot up the remaining nob and ork, scoring one victory point there. The demon prince launched itself at the deffkoptas, killing the last two in close combat. Finally it was down to the ork turn. With a two point deficit they needed to kill at least two of the three remaining chaos units without giving anything up in the close combat phase. Wazdakka zipped over to the defiler and used his great shooty gun to reduce the demon engine to scrap. Then it was up to the lootas to put their meager five shots into the demon prince. When the rattling dakka was finally over the smoke cleared, revealing the demon prince had failed its armor saves and been banished back to the warp.

With a roll of a die the campaign was over. Final score was 6 kill points for the orks and 6 kill points for chaos.

Final Thoughts
What a blast. Really I don't think it could have come out better than it did. In all the campaign was a good time and I recommend everyone crack open their big rulebooks and give it a shot.

Tuesday, March 23, 2010

Campaign Battle Report: Road to Glory Battle 4

With Mission 5 of the Road to Glory campaign coming up soon it's high time I got the battle report for mission 4 done. By the book battle 4 is called "Beginning of the End," but in this case it might more appropriate to call it "Turning of the Tide." In this engagement, each side is trying to gain the upper hand in preparation for the final showdown.

The Chaos army list was in this post.

Ork Army List
  • Ghazghkull Thrakka (225)
  • Warboss with warbike, cybork, power-klaw and bosspole (140)
  • 20 Boyz led by a nob with power-klaw and bosspole (160)
  • Trukk (35)
  • Battle Wagon with deff-rolla (110)
  • 5 Mega Nobz (200)
  • 5 Nob Bikerz with 2 power-klaws (275)
  • 7 Lootas (105)

Setup
The Mission was Capture and Control with Spearhead Deployment. The sneaky orks placed landmines around the battlefield. Chaos won the die roll for choosing first turn and decided to take the initiative this battle.


Turn 1
Chaos' first turn sees a little bit of jockeying for position, but not much overall advancement. Everything that could shoot unloaded on the orks and managed to destroy the trukk and kill a nob biker. The orks mostly moved in their phase, rushing forwards to come to grips with the marauding chaos marines. The lootaz bounced their shots off the defiler and the footslogging meganobz jumped into a crater in front of them.

Turn 2
Chaos brought the fight to the enemy this turn. The defiler and chaos marines shot at and assaulted the nob bikerz, killing a couple, losing a few in return, and ending the assault with a tie. The big disappointment was Abaddon jumping out of his land raider and assaulting the battlewagon. Zero attacks from the big guy and the battlewagon was set for deff-rolla action in the ork turn. The meganobz piled out of their crater and joined the bikerz in close combat. The boyz jumped out of the trukk and gave the evil eye to Abaddon. The battlewagon surged forward, slamming its deff-rolla into the land raider, tearing off a couple of weapons and immobilizing it. At the end of the shooting and assault phase all the chaos marines were dead, the defiler was destroyed, and Abaddon had taken a couple of wounds and given nothing in return, being too busy wrestling with his sword's bound demon.

Turn 3
The chaos bikers siezed the opportunity to meltagun the battlewagon, wrecking it for good. The rhino moved in an attempt to block the chaos bikers from being assaulted by the meganobz. Abaddon finally gets his sword under control and kills a fistful of boyz, but they still have numbers enough to be fearless. In the ork turn the lootaz shoot the chaos bikers, leaving naught but spinning tires and broken ceramite. This left the meganobz to assault the rhino, tearing off its bolter and leaving it immobilized. Abaddon killed another fistful of orks but they stood strong and the embedded nob managed to take off one more of abaddon's wounds.

Turn 4
Seeing the end in sight, the Thousand Sons left the land raider and began their movement towards the objective in the chaos deployment zone. The rhino managed to repair itself. If the Thousand Sons could make it to their objective and Abaddon and the rhino could keep the bikes and meganobz busy chaos might be able to pull out a win. In the assault phase, Abaddon finally managed to kill enough boyz to rout them. In their turn, the orks press their advantage. The bikerz finished off the immobilized land raider and the meganobz destroyed the rhino once and for all.


Turn 5
Abaddon muscled his way through the intertwined wreckage of the land raider and battlewagon, emerging on the other side to rush into an assault on the nob bikerz. The Thousand Sons moved and ran, trying to put distance between themselves and the orks hot on their trail. The assault phase went to the orks, with all of Abaddon's attacks either missing or bouncing off their cybork bodies and a host of power klaws removing the last wound from the chosen of the chaos gods. In the ork turn there was little left to do except kill the remaining Thousand Sons in a combined biker and meganob assault.

With all the forces of chaos destroyed, the Orks are declared the winner.

Final Thoughts
See. Abaddon isn' t so tough after all. A big squad of boyz is a huge tarpit for a lone model to get through. Chaos' mistake was not having a support unit to take some of the pressure off their general. The orks capitalized on this by throwing away a cheap unit as a tarpit and applying the rest of their force against a smaller portion of the chaos army, slowly chewing through them in bite-sized morsels.

Here's the campaign map at the end of battle 4.


Monday, March 22, 2010

Campaign Battle Report: Road to Glory Battle 3

The third battle in the Roady to Glory campaign is supposed to represent the attacker's attempt to break through the defender's front lines. In probably the shortest battle report I have ever written, here are the results.

The chaos army list can be found in this post.

Ork Army List
  • Warboss with mega-armor, cybork and power klaw (135)
  • Warboss with warbike, cybork and power klaw (135)
  • 20 Boyz led by nob with power klaw and bosspole (160)
  • Trukk (35)
  • Battle Wagon with deff-rolla (110)
  • 5 Mega Nobz (200)
  • 5 Nob Bikerz (225)
Setup
The game was Capture and Control with Pitched Battle deployment. As the winner of the last game, chaos was able to decide that the orks got the first turn.


Turn 1
The orks gave it everything they had. Abandoning their defence lines, they raced forward to get to grips with the chaos interlopers as quickly as possible. Chaos rose to the challenge on their turn. Everyone got out of the land raider, which focused all it's armament on the trukk, destroying it. After the Thousand sons poured fire into the bikerz, Abaddon and the defiler charged into them. One quick but vicious assault round later, some bikerz and the warboss were dead, and the defiler had exploded. Fearing the continued attentions of Abaddon, the bikerz fled.

Turn 2
The battlewagon raced forward to get its boyz into combat, but with a loud ker-chunk, immobilized itself on a piece of terrain. The boyz piled out anyways and sort of jogged towards the melee in the middle. Seeing Abaddon standing out in the open all alone, the meganobz shot at and assaulted him. Luck was not on their side and Abaddon handily won that combat as well, killing the warboss and sending the one surviving nob fleeing for his life. In the chaos turn, the rhino moved towards an objective, but it turned out to be unnecessary. The Thousand Sons and Abaddon shot down a few boyz, then Abaddon charged in, killed half of the remainder and sent the rest fleeing.

With all the orks units fleeing from the table with no chance of rallying, we called the game. Chaos Wins.

Final Thoughts
Abaddon cleaned up. This strikeds a chord with a post on From the Warp about the unbalancing power of some special characters in games. Abaddon certainly unbalanced this game, but as we'll see in Battle 4, there are things that an opponent can do, even in lower point games, to deal with overpowered characters.

Tuesday, March 16, 2010

Road To Glory: Army Lists for Battles 3 and 4

Tonight we get down and dirty with Missions 3 of the Road to Glory campaign. If we have time we're going to attempt to do mission 4 as well.

Here are the army lists I'll be using.
  • Abaddon (275)
  • 5 Chaos Marines in a rhino champion with power fist (150)
  • 5 Thousand Sons & Sorceror with doombolt (185)
  • Defiler (150)
  • Land Raider possessed (240)
Both missions are objective based, and I'm going a little bit light on scoring units. Compared to last week I'm a bit more mobile and everything has an armored shell around it. This could be good or bad since I'm sure the ork mechaniks have been hard at work fitting deffrollas to everything. Abaddon and the thousand sons are tasked with bringing the pain and securing a remote objective. The chaos marines will secure their own objective and act as a delaying force/bait. The Defiler is in charge of objective denial and artillery.

If we have time we're going to go on and play the fourth mission. Here's the list I'll be using for that.
  • Same as above (1000)
  • 3 Bikes champion with power fist and two meltas (159)
  • 5 more chaos marines and plasma gun (90)
Same objectives as the first list. The addition of the bikes will give me some fast anti vehicle, allow me to contest late in the game or finish off a unit in assault.

Monday, March 15, 2010

Campaign Battle Report: Road to Glory Battle 2

The second battle in the Road to Glory campaign is the battle to determine who is the attacker and who is the defender. It's also the first battle that has an effect on the next battle. Chaos and Orks were both taking this seriously and bringing their game face.

For those of you just joining us, here's the initial post on the campaign (including the chaos army list used), the battle report for mission 1 and the ork writeup.

I've also updated the campaign map to the right. Warning that it contains spoilers regarding the battle report below.

Ork Army List
  • Warboss mega armor and boss pole (105)
  • 4 Mega-Nobz with a deff rolla battle wagon (270)
  • 12 Boyz in a trukk with a nob carrying a power-klaw and boss-pole (147)
  • 5 Nob Bikerz (225)
Setup

Mission two was Capture and Control with Dawn of War deployment. We used the same board setup as the first mission. This time we had an objective in my deployment zone on the left flank and one on the right in the ork deployment zone. The bold orks deployed in the center and sneaky chaos refused to deploy anything.

Turn 1

The meganobz in battlewagon took off for the objective on the left flank and the trukk hung out in the center waiting for the chaos forces to arrive. The nob bikerz entered the board and moved up behind the trukk. In the chaos turn, everything came in on the right flank, with the defiler more towards the center and the prince and rhino on the right. The rhino popped smoke and the defiler bounced some rounds off the trukk. The thousand sons stayed off board, biding their time.

Turn 2

The ork battlewagon made it to the left flank objective and everyone inside settled in for a nice long lurk. The trukk popped over to the right flank, the boyz piled out, declaredwaaugh and ran. Not quite far enough to get to the demon prince. They did get to the rhino but nothing managed to damage it. The bikerz turbo boosted, lurking menacingly while watching the action. In the chaos turn the demon prince and marines in rhino ignored the boyz and rolled up on the bikerz, shooting and assaulting them, but not killing them all. The defiler walked up a hill and poured hot promethium and autocannon rounds into the boyz squad, killing everyone except the nob. The thousand sons stayed off board, biding their time.

Turn 3

In the ork turn the trukk retreated, setting up for late game objective contention. The last biker held out against the demon prince, keeping him locked in combat for the chaos turn. The meganobz turned on the battlewagon television, continuing to lurk in the trees by their objective. The lone nob is forgotten and unloved. In the chaos turn the prince and marines finally brought down the last biker. The marines consolidated towards the trukk and the prince started to move to the left flank.. The defiler also turned its attention towards the left flank, and knowing that it had a ways to go, started running. The thousand sons stayed off board, biding their time.

Turn 4

The trukk continued to lurk, looking for a position far enough away from the demon prince. The television turned out to be boring so the meganobz disembarked hoping to find something interesting to do near their objective. The lone nob remained forgotten and unloved. The chaos marines downed the trukk with concentrated plasma fire, sending it careening into a nearby forest where it exploded. The rest of the chaos forces moved as fast as possible towards the left flank where the thousand sons finally made their triumphant appearance.

Turn 5

The battlewagon tank shocks the thousand sons, crushing two under its deffrolla. The lone nob got remembered and manages to assault the chaos marines, pulling them away from their objective. The chaos marines fail to kill him in the ork turn, but do finish him off in the chaos turn, although they are unable to consolidate far enough to grab their objective. The thousand sons advanced and the demon prince moved up to contest the meganob held objective.

At the end of turn five no one has an uncontested objective. We roll for the end of game and it's over. Tie! Which is boring. So...

Turn 6

The battlewagon hit the demon prince with its deffrolla who met it head on with a death or glory attack. The battlewagon exploded but the prince took some wounds in the process. The meganobz danced and hooted when they finished him off with their shootas. In the chaos turn the marines finally got to their objective, the thousand sons ran to contest the meganob objective with the rhino in hot pursuit. The defiler assaulted the meganobz and smashed the warboss to paste before being pulled down by massed powerklaws.

With the right flank objective firmly under chaos control and the left flank objective in hot contention we ended the game with chaos winning, one objective to zero. Chaos has been declared the attacker for the Road to Glory campaign. They'll also get to choose who goes first in the next battle.

Final Thoughts

Deffrollas are probably nastier against vehicle armies. But against armored troops d6 S10 AP- hits isn't so bad. Sure it's S10 but if you've got 3+ armor you're not going to get too hurt. As for the current "controversy," I don't think it's unfair for the orks to have deffrollas as anti-vehicle. The ork codex doesn't have melta and most of its long range shooting is low powered. As an ork it's hard to get the S9 or S10 attacks that you need to nuke a land raider.

I'm enjoying making the map. The overall layout is similar to the campaign map in the main rulebook, but I've started from scratch using Inkscape. I've been drawing inspiration from the Battle Missions book for ways to better the map's look and feel.

Stay tuned! The next stage in the campaign should be played out tomorrow evening.

Saturday, March 13, 2010

Battle Report: Road to Glory Battle 1 - Orks

My orky opponent for the Road to Glory Campaign was kind enough to do a writeup of the first battle as seen from his side of the table. I think it's important to analyze the battles you lose even more than the battles you win. It's also interesting for me to see what my opponent's plan was and what they think the major turning points in the battle were.

So without further ado, here's the message of the day from the orks.

Pre-Battle Thoughts

My plan was to have superior mobility and use that to mass my forces on the enemy’s flank. In a 500 point game, if you can kill even one unit without many losses to yourself, that can stack things against your opponent in a way that’s very hard to fight back from. I ended up deploying first and was able to put my entire army on, despite Dawn of War deployment restrictions. I placed everything in the center, as close to the opposing table edge as possible. My vehicles were close enough for the opponent to be able to walk on and shoot at them, but Mega-Nobz and a 12-man Boyz unit would not make it across the board if they were forced to walk from further away, so I just hoped that the Battle-Wagon at least would resist the first turn salvo. After that, rush toward whatever’s toughest, kill it early and hope that my opponent has a harder time whittling away my forces without their ace unit.

Then the battle happened.

Post-Battle Thoughts

Drat. Both vehicles were stunned on the first turn; no moving or shooting, so my slow-and-purposeful Mega-Nobz and small Boyz mob would have to walk from the half-way point. Fortunately, it was turn two so the waaagh helped me get some of them across. I prioritized the Daemon Prince because of its deadliness and mobility. I did manage to kill it, though my Boyz were also killed. With just Mega-Nobz left, chaos had no problem out-pacing me. The Mega-Nobz did survive a lot of shooting, but this wasn’t a kill-point game. I think if I was to summarize my mistakes, it would be that I was trying to play a 500 pt Objectives match as though it were 1500 pts. With so few units, running away or at least keeping 50% of my forces back should’ve ranked higher on my battle strategy list. Instead I attacked like an Ork ought to, and the Chaos Space Marines were all-too-ready.

Thursday, March 11, 2010

Battle Report: Road to Glory Battle 1

My buddy and I started off the Road to Glory campaign this week. You can see the campaign map and chaos army list in the initial post.

The first battle was a hard fought mission with lots of jockeying for position.

First the ork army list:
  • Warboss in mega-armor (100)
  • 4 Mega-Nobz with Battle Wagon (250)
  • 12 Boyz in a trukk with a nob carrying a power-klaw and boss-pole (147)
Setup

We set up a nice looking board with some snowy terrain and forests. The mission was seize ground and we ended up with three objectives. One was placed one near the center and the other two ended up on the left flank. The orks deployed everything in their transports in the center of the table and chaos declined to deploy anything.

Turn 1

The orks advanced full speed into the chaos deployment zone but with the enemy nowhere in sight had nothing else to do. The chaos defiler came in on the right and the rest of the army piled in on the left. The chaos marines on foot opened fire at the trukk, stunning it, and the defiler leveled it's autocannon at the battlewagon, leaving it stunned as well. The picture shows the disposition of forces and objectives at the end of turn two. Not shown is the defiler just out of frame on the right.

Turn 2

The warboss and meganobz abandoned the stunned battlewagon and began a long footslog across the board to the left flank. Similarly, the boyz abandoned their trukk, shout out a mighty waaugh and rush the demon prince and rhino. Having made a full move the previous turn, the rhino was safe, but the demon prince ended up taking some wounds and killing of a couple boyz. In the chaos turn both marine squads joined the demon prince against the hapless ork boyz. Between them they managed to beat the greenskins and catch them in a sweeping advance but not before the nob took the last wound off the demon prince. The picture shows the left flank at the end of turn two.

Turn 3

The warboss and meganobz continued towards the action on the left flank and the trukk moved to try to box in the rhino and keep the left flank objective contested. One of the space marine squads piled into the rhino which high tailed it through a forest. The second squad shifted into cover near the objective and shot up the trukk, destroying it. Over on the right flank the defiler began to chase after the meganobz, shooting at them but missing.

Turn 4

The meganobz continued their slow and purposeful advance. The defiler charged the forgotten and unloved battlewagon, handily destroying it. The rhino and marine squads secured the left flank objective in the ork deployment zone. The other space marine squad poured fire into the meganobz but only managed one wound.

Turn 5

Huffing and puffing from exertion, the meganobz finally reached the left objective and sat down for a rest. Fearing that the game would end in a tie, the chaos marines near them charged, drawing the orks away from the objective. By the end of the assault only one marine was left, but this was enough to force the meganobz to pile in even further away from their objective.

A final die roll decided the game was over on turn five and chaos won, one objective to zero.

Final Thoughts

Meganobz are tough nuts to crack in a low point game. Despite lots of shooting I didn't kill a single one. Instead, I had to use luring and containment to keep them ineffective for most of the game. As for the plan I laid out in the first post, some things worked and some didn't. The rhino with marines grabbed an objective in the back like I had planned, but the demon prince didn't really get to choose his own target. This was my fault for getting him an inch or so too close to the trukk. The defiler didn't end up being a major player, either. His task was to camp an objective and provide fire support but there were very few objectives and not many targets suitable for a battle cannon. If the game had ended up going longer the defiler would have come back into play on turn six or seven by contesting the meganob objective.

The other thing is Dawn of War deployment seems to do a role reversal, putting whoever goes first on the defensive. When you have the second turn there's little incentive to start with anything on the board. Denying your opponent an entire round of shooting, taking away any chance of a turn one assault, and being able to choose your initial deployment after seeing how your opponent is situated are very valuable advantages that I have a hard time giving up.

Stay tuned for the results of mission 2 and an updated campaign map.

Tuesday, March 9, 2010

Campaign: Road to Glory

Tonight marks the beginning of the Road to Glory campaign with Orks taking on Chaos. The two armies have been staring at each other across no man's land for some time now and soon one side will be making a push to bring this confrontation to an end. I've started a campaign map to chronicle events. We plan on playing the first two battles tonight so those are already on the map (I realized today that I mislabeled the second battle). Depending on the outcome I'll add in ork and chaos symbols, and maybe switch the arrow colors depending on who ends up the attacker.

We're playing the campaign escalation style starting at 500 points and increasing by 250 each game. Here's the chaos army list for the first battle:
  • Demon Prince wings, khorne (140)
  • 5 Chaos Space Marines plasma gun (90)
  • 5 Chaos Space Marines flamer, rhino w/extra bolter (120)
  • Defiler (150)
Everything in the list has a job. The khorne prince's aim is to move fast and take out any troops or fast units, preventing the orks from grabbing objectives or contesting late in the game. The chaos marines in the rhino will move and take a mid-field objective while the other marine squad will hold an objective in my deployment zone (preferably in cover) and provide fire support. The Defiler will move up and guard an objective mid-field while shelling large groups of orks.

The list for the second game is 250 points bigger but identical in purpose. The chaos marines have been combined into one squad and given some heavy hitting plasma weapons. Deployment zone objective duties go to the slow and purposeful thousand sons whose armor piercing fire will provide valuable support. The second game is capture and control so the khorne prince will follow the marines in the rhino to the ork objective and wipe up any opposition.
  • Demon Prince wings, khorne (140)
  • 10 Chaos Space Marines 2 plasma guns, champ w/power fist & combi-weapon, icon of chaos glory, rhino (275)
  • 5 Thousand Sons & Sorceror w/doombolt (185)
  • Defiler (150)

Monday, February 22, 2010

Attika Campaign: Mission 4

Here's the last mission in the Attika Campaign. Chaos is running rampant in the streets of the holy city, searching for artifacts and the precious gene seed.

You can find the other missions here.
Mission 1
Mission 2
Mission 3

Mission Set 4 - Fighting in the City Streets.

No matter what the outcome of the battle at the Temple City Walls, some chaos forces eventually make it inside the city gates. Once inside they move swiftly to seize control of the city, the temples and the artifact vaults. Most importantly, control of the city will give them time to find and secure the entrances to the underground complex storing the space marine gene seed.

Players should again pair off against each other. These missions should be played at 1000 points. Mission type is Sector Control (see below) with Dawn of War deployment. Opponents dice off to see who deploys and goes first.

Just like the Mission Set 1, players in each game should keep track of the number of objectives they control at the end of the game. Once all the games have been played add up the objectives won by the chaos and imperial side. Whichever side controlled more wins the campaign.

Sector Control - After choosing sides and deploying troops, divide the table into quarters. Players take turns placing a total of four objectives, starting with the player who deployed first. There may only be one objective in each quarter, and objectives must be twelve inches away from the edge of the board and all other objectives. All other rules follow the Seize Ground basic mission.

Remember that the side that won Mission 3 gains the Reinforcements special rule for the games they play. Note that this is slightly different than the Apocalypse Replacements strategic asset.

Reinforcements - Once a game when a unit from a troops choice is killed that unit may immediately be put into reserves. When they arrive the controlling player must bring them in from his table edge, they may not deep strike or outflank. Dedicated transports do not count for determining if the troops choice is destroyed, and do not come back with the reinforcements.

Tuesday, February 16, 2010

Attika Campaign: Mission 3

Mission three for the Attika Campaign. This was an apocalypse sized game. We ended up with Abbadon's Black Crusade leading a demon force against defending imperial guard, dark angels, and witchhunters backed up by a baneblade and stormlord. After some brutal carnage, the imperial forces barely managed to eek out a victory, holding the line against the chaos incursion.

Here is mission 2 and mission 1.

Mission Set 3 - Temple City Walls

Kept within the vaults of the Temple City are numerous tomes and artifacts of ancient lore. Seizing these alone would be reason enough for the forces of chaos to attack a planet. The greatest prize, though, lies miles below the surface: gene seed which can be used to bolster the ranks of the chaos many times over. With all the chaos forces converging on the walled city, the defenders have rallied to keep them out.

Mission

This is an apocalypse mission played at 3000 points. Each side should divide the points evenly amongst its players.

If the chaos forces win this battle they have broken the city defenses and will pour unchecked into the city. If the imperials win they have broken the chaos advance and allowed time for further reinforcements to arrive. In either case, the side that wins will be allowed Reinforcements in the next mission. In the case of a tie the furious battle has taken its toll on both forces and neither receives Reinforcements.

Reinforcements - Once a game when a unit from a troops choice is killed that unit may immediately be put into reserves. When they arrive the controlling player must bring them in from his table edge, they may not deep strike or outflank. Dedicated transports do not count for determining if the troops choice is destroyed, and do not come back with the reinforcements.

Saturday, February 13, 2010

Attika Campaign: Mission 2

I posted the first mission a few days ago, and here's the second mission from the Attika Campaign. My group had four people in it, so doing two missions like this made sense. If you've got more than that, or an odd number of people you can make it work by doubling up players on either side and splitting or upping the point allowance. If you have fewer players, 2 or 3, just play the missions one after the other. When we did these missions each side kept which player was assigned to which mission a secret, so no one knew exactly what army they were going up against.

Mission Set 2 - Strategic Goals

With chaos strike forces landing across the globe, the defenders are hard pressed to respond to every attack. Some locations are more strategically important to than others, and both sides are making big pushes to take control of them.

Players choose which of the two missions they wish to play, making sure that there are an equal number of players on each side per mission.

Manufactorum
The bulk of materiel for the imperial garrison comes from a single manufactorum located to the north. Whichever side controls it will more easily be able to resupply and refit their forces.

This is a Seize Ground mission played at 1500 points per army with 5 objectives. Whoever gained the initiative in the last mission places the first objective. If no one has the initiative then roll dice to see who places the first objective.

Reward: The winner of this battle has seized an important source of armament and resupply. In the next mission the winning side gains, at no point cost, the Extra Armor upgrade on all vehicles that have it as an option. In the case of a tie the fighting has damaged the manufactorum to the point where it is useless to both sides.

Defense Laser
An orbital defense installation threatens the fleet of whoever does not control it. Both forces are desperate to seize it in order to provide their fleets in orbit with surface-based fire support.

This is a Seize Ground mission played at 1500 points per army with 5 objectives. Whoever gained the initiative in the last mission places the first objective. If no one has the initiative then roll dice to see who places the first objective.

Reward: The winner of the battle will use the defense laser to push the opposing fleet out of low orbit. This takes the pressure off their own fleet and allows them to provide orbital support to the ground troops. Whichever side wins gains the Orbital Bombardment strategic asset in the next mission for free.

Thursday, February 11, 2010

Attika Campaign: Mission 1

Last year I put together a campaign for my gaming group. It lasted four weeks and was a blast not only to play, but also to create the backstory and scenarios. I'll be posting the missions and backstory that we used for this four week campaign. The scenario fluff is written for Imperials vs. Chaos, but there's no reason it won't work for any mix of armies. Everyone should just pick a side and try to have an equal number of players on each side.

In 862.M41 Ordo Hereticus Inquisitor Enzio Balmont was dispatched to the far western sector of Segmentum Pacificus to oversee the gene seed tithe of the Sons of Mars space marines chapter. After acquiring the gene seed, Inquisitor Balmont set out to return to the Mechanicus tech-priests on Mars. So precious was the gene seed, the strike cruiser Ares was sent as an escort with the entire fourth company of the Sons of Mars onboard.

Under Inquisitorial edict, and against the wishes of Euenos Ialmenos, captain of the fourth company, a detour was made to the temple world Attika VI. Reports from the imperial governor indicated a recent increase in mutant births, psyker expression and the heretical beginnings of an end times cult. Backed by the might of a full Space Marine Company, Enzio decided it would be short work to uncover and uproot the heresy on this world.

On Attika VI itself, civil unrest was at an all time high. Cult leaders claiming the emperor had abandoned humanity were gaining new followers every day. The local Arbites were suppressing a continuous riot. All their energy was spent maintaining order. No resources were available to expose the roots of the heresy.

At the same time, members of the cult began expressing the psyker mutation at an increased rate. As the psychic presence of Attika VI grew in size, the baleful gaze of the Eye of Terror finally fell upon it. Slipping through the Cadian Gate, Spurci Odorin, a chaos warlord in command of the battle barge Deordo Chao, set course for the Attika system.

The chaos incursion force arrived just hours after the imperial convoy put into orbit. The demon-infested spacecraft launched their drop pods and landing craft before quickly retreating out of range of the planet's orbital defense lasers and the guns of the Ares. The war for Attika VI had begun.

Mission Set 1 - Incursion

With the arrival of the chaos fleet, the cultists rose up against their planetary rulers and warp rifts spilled demons into the material plane. The chaos fleet used their teleporters and landing craft to strike at random locations around the heavily fortified temple compounds. High above the atmosphere imperial spaceships engaged the chaos fleet.

Missions

Chaos and Imperial players should pair off against each other. Games are 750 point annihilation games played on 4 foot by 4 foot tables. At the end of each game players should note down how many kill points they managed to score. Add up the total points for chaos and imperial. The side with the most total kill points wins. Each player can play multiple games, the results of which all contribute to the final tally.

If chaos wins they have sown panic and mayhem in the ranks of the imperials. If imperials win they have responded swiftly and decisively to the chaos incursion. In either case, whichever side wins has gained the initiative and can choose the deployment type for the next mission. In the case of a draw, roll randomly for deployment type as described in the Warhammer 40,000 rulebook.