Tuesday, December 24, 2013

Merry Cryxmas

It's that time of year again.  The time when the Dragonfather brings his blight to all the little boys, girls and steam powered robots of the world. Despite having a beautiful little 15 point Khador army ready to take for a spin I got myself into the holiday spirit and deployed pGoreshade against the Cyriss army I've been running against for a while.

     Click to see reports of the same Cyriss army against Everblight and Cygnar.

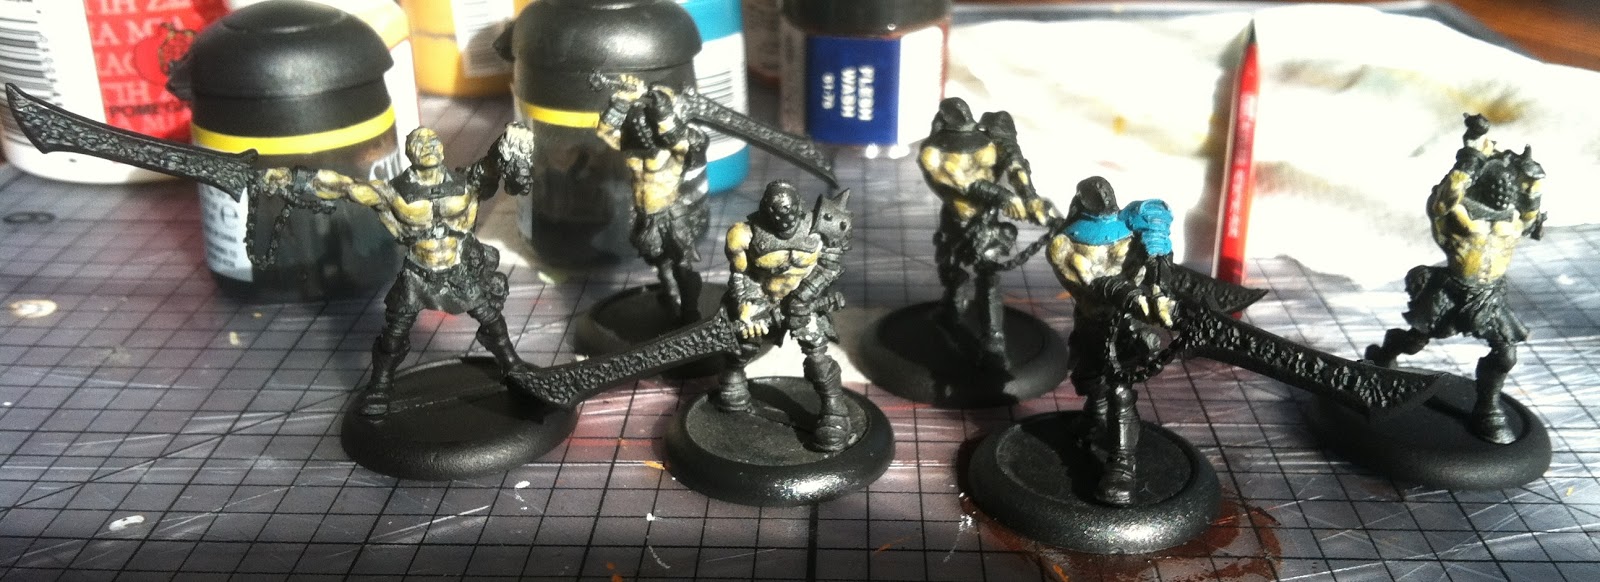
Here's the Goreshade list.  It is extremely heavy on stealth and at 15 points bringing in an extra unit of Bane Thralls from Goreshade's feat is devastating.  In fact I'd say that Goreshade is one of the best Cryx casters at the low point level just for this reason.

  • Goreshade the Bastard
  • Slayer Helljack
  • Deathripper Bonejack
  • Warwitch Siren
  • Withershadow Combine
  • Bane Lord Tartarus
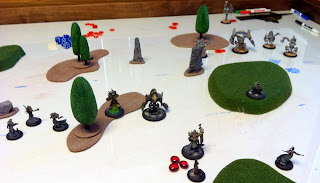
My opponent won the roll and had me set up and go first.  I set up with the Warwitch Siren and Deathripper on my right and the Withershadow on my left.  Cyriss refused my left flank and set up his entire force on my right.

My first turn was pretty basic with Goreshade giving himself and his battlegroup stealth and everything running up into the center to take early board control. Cyriss responded by moving up slightly and lobbing scattered AoE attacks.

End of turn one.

On turn two I moved further into the center, and recast stealth on my battlegroup.  The Withershadow blasted two servitors out of the sky. Cyriss took the opportunity to climb the hill and put some shots into the bonejack.  The random AoEs either failed to connect with anything or didn't roll high enough with blast damage to hurt anyone.  Across the board stealth was causing a lot of pain for my opponent, but the Withershadow were still out of position, my Slayer was staring down an improbably matchup against the opposing Cyriss heavy and the three lights were poised to go after Goreshade if I didn't change the situation on my turn.

End of turn two.

Turn three would be feat turn for Goreshade. The Slayer and Tartarus ran in and knocked out the opposing heavy by taking advantage of the armor debuff from Dark Shroud.  The spell on the heavy triggered, letting it reconstruct within three inches of its current location, back in the forest.  My Warwitch and bonejack jammed what they could on the right side, but failed to connect in any meaningful way and the Withershadow took potshots at the heavy and unengaged light but didn't do much.  Then Goreshade moved up and took advantage of Tartarus' curse to send Bane Thralls to put the heavy down again, knock some damage boxes off the lights and jam up the center.

End Cryx turn 3

Facing down an angry mob of soul-fueled killing machines there wasn't much Cyriss could do. Syntherion floated around in the back, using his feat to have the remaining light 'jacks put some damage on Tartarus and kill a few Bane Thralls.  We played out the rest of the game but with Cryx so far ahead on the attrition game it was pretty clear how things were going to end.

The game went well for me. Taking control of the board center early on turned out to be a good response to the refused flank of my opponent. It kept him pinned into the corner of the board.  Lots of stealth units and an extra mid-game unit of Bane Thralls meant that I was able to blunt Cyriss' shooting prowess and get a strong alpha strike.  As usual with small games like this, taking down the opposing heavy first can really seal the deal.

There are a few things I could have done better:
  • I should have used the Withershadow or Goreshade's spells to strip the reconstruction spell off the enemy heavy before going in for the kill.  If I had, my banes could have all gone after the opposing lights and the game would have been definitively over more quickly.
  • The Wihershadow could have ad more effect.  They were basically stranded on my right flank and got slowed down blasting half point servitors out of the sky.Turn three saw them taking potshots at the heavy jack. I should have run them on turn three to get into better position for Dark Industries.
  • There are better things to bring for Goreshade than the Withershadow.  His lack of upkeep spells means one of the Combine's major benefits is not even. Those points could have been better spent.

So that's the first game of Cryxmas 2013. There's still more than a week left in the year and I'm looking forward to trotting out some of the other Cryx casters before it's over.

Friday, November 29, 2013

Learning with Lylyth


Desiring a change of pace, I shelved the Cygnar for my next game and brought out pLylyth and her warpack. Like many of my outings with her this one ended in failure, but as always the most valuable lessons are those learned under duress.

It was a 15 point game so I brought the basic battlebox plus a Harrier.  My opponent brought the same Convergence of Cyriss list from my last couple of battles.  You can read more about those here and here.

The first portion of the game was mainly maneuvering so that we would both have some models in the center to keep from losing by objective. On the second turn he sent one of his light jacks hurtling towards my Carnivean.  Though it was surely a sacrificial gesture, a string of terrible dice rolls meant that the light was still left standing at the end of my turn.  I rushed the rest of my force forward to jam things up until I could free my heavy.  I figured if I had my Carnivean and Lylyth there was still a good chance I'd be able to get a caster kill.

Here's the board at the end of that turn.


Cyriss spent the next turn bringing up his warcaster to try to clear the jam.  The decent defense of the Harrier meant that it survived, but the two Shredders in front of Syntherion and the opposing heavy were not so lucky. Still, his caster was close and I had some resources to try to seal the deal.

The turn started decently when my left hand shredder frenzied, charged Syntherion and put a pile of damage on him with a lucky high dice roll. The rest of the turn went badly, with Lylyth's shots either failing to hit (because of the shot into melee penalty) or failing to damage (because of Syntherion's high ARM).  The Carnivean stepped away from the light that was harassing him, easily shrugging off the free strike. A quick breath attack later and Syntherion was on fire and left with only a few remaining health boxes.

The end of that turn left me exposed and hoping that fire would claim Cyriss' Forge Master.


It didn't. The fire went out. My heavy was killed by his heavy and the light jacks finished off everything else in my army, ending with Lylyth.

Despite being tabled in the end the battle was well fought, with both sides coming very close to defeat before the final blow landed.  There are only two things I would have done differently:
  • Looked for a better use of my feat.  There were turns I could have used it to very good effect (especially the last turn's assassination attempt).
  • Boosted my Carnivean's attacks against the light jack jamming him.  I needed a seven to hit the light in front of me and I missed 5 out of seven attacks. For his four fury I could have had two bites with boosted attacks instead of four normal bites.  I really needed the light dead and so I should have ensured hits from the bites which would have been rolling even dice on damage.


You can read more about my thoughts on the Legion of Everblight battlebox here.

Sunday, November 10, 2013

Khador Widow Makers

These fine fellows and accompanying lady are ready to lay precision waste to the foes of the motherland.  My last post on these guys had them half basecoated standing in front of an equally rough Devastator.  Now their brown cloaks have been finished and their guns are all brassy and ready to fire.


This means I can update my Hobby Scorecard on the right and also that my 15 point Khador army is only two models away from being ready to take the field.  All that is left now is a Devastator and Sorcha.  I can't wait!

Saturday, November 9, 2013

Cygnar: Perils of Allistair Caine pt. 2

Allistair Caine.  Hate him or love him, he's probably got more personal warcaster kills under his belt than any other Cygnar caster out there.  In my previous post I talked about the first game I played against Cyriss and discussed the army lists that were used.  Now it's time to discuss the second game.
Here's what the board looked like at the end of the second game:


This second game was more decisive than the previous.  Caine was able to sneak in and leave Syntherion with only 3 health left using his feat.  Ryan from the Black 13th got the final shot in that killed the opposing caster.  Despite winning I still only managed the caster kill with my very last shot of the turn, and I definitely made some mistakes.
  • Reinholdt wasn't able to give Caine a free shot on my feat turn.  He was just too far away. The little gobber can be fiddly to use.  Reinholdt needs to activate before your warcaster so you can get an extra shot, but also needs to end up in a position where he'll be able to get to your warcaster next turn.  Caine is a fast moving dude and can often outpace the little guy.
  • The warcaster kill was a very close thing.  The last possible shot of my turn rolled exactly the number necessary to kill the opposing warcaster.  I should have activated Caine before the rest of my army so that if the assassination failed I would be able to use the rest of the army to secure his safety.
So in the interests of improving my game, here are some things I (and you!) can do to improve the Caine game.
  1. Be wary of high ARM targets.  Caine's feat is great, but if you're putting shots into 18+ ARM you should think twice.
  2. Move Caine minimally.  This will let Reinholdt keep up with him and help keep Caine himself safe from retaliation.  Use your ability to measure Caine's control area to position yourself exactly where you want to be.
  3. Activate Caine first on the feat turn.  Unless you need an effect from another element of your army use Caine first.  After his activation is over you can evaluate the situation and determine if the rest of your army can finish the job or needs to move to protect him.
  4. Always assume that your opponent can reach you.  Even if the opposing army looks slow you should assume they have some way of improving their charge distance.  Keeping this in mind will mean that you're never surprised by the mobility of your opponent.
I think that's enough things to try to remember for my next game.  What do you think are some rules for Caine to live by?

Wednesday, November 6, 2013

Cygnar: Perils of Allistair Caine

I've recently had the chance to pick up my Cygnar and roll some dice with them.  A group of folks at work have either just started or have dusted off their old armies. I've brought out a range of builds, including Everblight and Cryx, but last Thursday I had the chance to bring back premier assassination caster Captain Allister Caine against the new (to me) forces of Cyriss.

Let's break down the army lists (15 points each):

Cygnar
  • Captain Allister Caine
  • Defender Heavy Warjack
  • Hunter Light Warjack
  • Reinholdt
  • Black 13th
Cyriss
  • Forge Master Syntherion
  • Cipher Heavy Warjack
  • 3 Diffuser Light Warjacks
  • 3 Attunement Servitors
  • Algorithmic Dispersion Optifex
Let's take a look at the end of the first game.  Note that we didn't play the final turn, but just assumed that Caine and the rest of the army would be able to assassinate Syntherion without much trouble.  We called the game in favor of being able to get another one in.


The thing to talk about here are the mistake that I made that led to Caine being in such a precarious position.  By the end of Cyriss' last turn Caine had taken 8 points of damage and one reasonable roll by my opponent would have ended it before I could go after Syntherion. What led to me only surviving by the skin of my teeth?  On turn two my Defender, Hunter and Caine moved up to kill the heavy Cypher using Caine's feat.  Killing the opposing heavy warjack would leave me in a dominating position and I was hoping to have enough focus left to gate crash out.  I manage to kill the Cipher (You can see it's crater on the top edge of the hill) but almost died myself in return.  Here's a summary of my mistakes:
  • Overestimating Caine's Feat.  Caine can do a lot of damage on his feat turn, but against ARM 18 and a heap of damage boxes even he can have a hard time getting the job done.
  • Not prepping properly for the subsequent turn by closing the gap between the Hunter and the Defender.  Caine's pistols only need a small gap to shoot through or he could have shot the large based heavy over the top of the medium based Hunter.
  • Relying on Caine's high defense.  The servitors and syntherion both have abilities that debuff Caine's defense.  DEF 17 is great, DEF 13 not as much. Caine's DEF should be relied on as a last resort and not as part of your battle plan.
  • Caine strayed too close to the opposing army. Caine's pistols have a range of 12 which matches his control radius. Stopping at the exact point you need to stop at is easy to determine.  In this case I needed to stop 9 inches away from the heavy (Syntherion's Reconstruct spell allows the 'jack it's cast on to respawn within 3 inches of the point it was destroyed).
  • Caine was way too close to the opposing army. The opposing army's light jacks allow allow charges against targets they hit to move an additional 2 inches.  Syntherion's DEF debuff gives an additional 2 inches. That adds up to a solid charge range.
Next post will go over the second game we played, and provide a concise list of actions I can take to improve my Caine Game.

(For the second game and an overall analysis click here.)

Sunday, September 8, 2013

Khador Prorgress

Some progress has been made on my 15 point Khador army. I've decided to tackle painting the Devastator warjack and the unit of widowmakers at the same time. Here is an in progress shot.


Painting time has been limited to an hour or so in the morning just a couple of times a week so I've only managed to get a bit of the base coat on.  The widowmakers will sport mostly brown with only a very small bit of blue on their shoulders.  This is to amplify their role as a stealthy unit while still keeping them cohesive with the rest of the army.

Once this merry crew is done I'll only have Sorcha left and then they'll be ready to carve a trail of destruction across Immoren.

Sunday, August 25, 2013

Hobby Scorecard Update 2012

A bit of housekeeping today.  It's time to update my hobby scorecard over on the left.  August is kind of late in the year to be updating something from 2012 but better late than never.

Ghordsun Basher and Thor Steinhammer painted by Blue Table Painting
Last year wasn't super productive.  I think for 2013 I have already exceeded last year's tally.  I chalk the lack of activity up to changing jobs and active house remodeling. I really need to make time to practice my craft here.
Ogrun Bokur painted by Blue Table Painting
The other thing that I'll mention is that all the models painted below were actually painted by the commission painting studio Blue Table Painting. I've done quite a few projects with them and I've been very pleased with the results.  I'll write up a longer review soon and post more pictures of their fantastic work.

Hobby Scorecard 2012

Models Assembled: 7 total
Warmachine: Khador
pSorcha
WarDog
Man-O-War Drakhun (+dismount)

Hordes: Legion of Everblight
Blackfrost Shard

Models Painted: 6 total
Warmachine: Cryx
Captain Rengrave

Warmachine: Mercenaries & Minions
Thor Steinhammer
Ogrun Bokur
Ragman
Ghordsun Basher
Buccaneer


Sunday, August 11, 2013

Doom Reavers Finished

My unit of Doom Reavers is now complete.  This marks the tipping point for the 15 point starter army I detailed here.  At this point I have 7 out of 13 models painted.


The blue and leather theme that I am using is somewhat reminiscent of the traditional Cygnar paint scheme.  I think, though, that the blue against the bone and leather looks quite good from a tabletop view.  No reason the spark addicts should have a monopoly on good looks.

These guys are going to look smashing leading the charge ahead of Sorcha and her Devastator. The conundrum now is which of my remaining three units get paint next.

Tuesday, July 23, 2013

One Piece of Doom Reaved

One Doom Reaver, minus basing, finished.  I don't know about the rest of you, but assembly line painting really starts to drag once I'm about three quarters done.  After shading and highlighting a half dozen leather skirts I put them all down and there's still just as much visible primer as an hour ago.


So this time, once I got to the point where I could wrap this guy up in another half an hour I just went for it.  Initially I wasn't sure how I wanted to do the swords for the unit, but some grey blended up to white to pick out the skulls seems to have done the trick nicely.


I may still take a wash to some of the elements and knock down the brighter spots on the leather and hair but in general I think he's going to look good screaming across the battlefield next to his buddies.

Tuesday, July 16, 2013

DoomReaver Progress and Tactics

I'm moving forward with the army list I described in my last post.  A unit of Doom Reavers will soon be joining my Khador War Hound.  Here are the bloodthirsty murderers waiting for the rest of their paint.


If you've never familiarized yourself with these guys head on over to the battle college and do so.  These guys are straight forward rules-wise.  Berserk weapon masters with high MAT and reach can turn opposing units, beasts and 'jacks into chunky salsa with a halfway decent charge. But unlike some other Khador units that can basically be point and charge these guys take a bit of finesse to get the most out of them.

Their berserk rule means that it's very easy to wipe out an enemy unit and then wipe out your own unit as well.  Fenris or a Greylord Escort can mitigate this with silence but these can be spendy options.  I believe that these guys really just require a few extra seconds of thought to keep them from turning on each other.

Try to put them in a position where their berserk attacks aren't going to hit each other.  Enemy unit flanks are a good choice.  Or group them like you would shield wall units so that if one does end up killing its buddy it only kills one buddy.  Order of attacks is also important so start attacking with the reavers that have reach on the greatest number of opponents, or if you are attacking a single target try to end on a reaver at the far end of your pack rather than in the middle to reduce the number of fellow reavers that are valid berserk targets.  Placement is key so really take the time to determine where they should go.

Doom reavers are a hard hitting unit so they'll probably be a high priority target for your opponents.  Try breaking up your unit, moving two or three of them five or six inches ahead of the rest and far enough away from each other to make trampling a dangerous prospect for your opponent. These screening models will hit too hard for your opponent to want to risk free strikes so they'll have to deal with them somehow.  Once they're engage (and likely killed) the rest of the reavers can countercharge.

Also remember that your reavers are abominations.  If you get charged by something that's not fearless make sure your opponent takes their command check.  A failed abomination check will immediately shut down your opponent's charge.

If you find yourself on the receiving end of a pack of doom reavers there are a few things you can do.  Their average armor and defense means that dedicated ranged units will kill these guys on average rolls.  Their spell ward only means that you can't target them directly with spells not that they are immune to them.  Using a throw away unit of your own to land an AoE can take out a few of them.

A player with a keen eye for distances can also use the automatic miss and template deviation rules to their advantage.  I once setup Terminus 10 inches away from the center of a pack of doom reavers, then cast Annihilation at a unit behind the doom reavers.  Automatic miss but the template ended up only scattering one inch and still caught most of the reavers.

Once these models are finished off my 15 point army will be more than half done models wise.  I'm hoping to have these guys finished up real soon so I can get started on my caster, jack and widowmakers.  Then it will be on to face smashing goodness.

Tuesday, July 2, 2013

War Hound

Nope, not the 40K Titan,  but this guy, the first painted addition to my Khador collection.

Oh war dog, I shall name you Fluffy.

Now the task at hand is to build an army to field this guy with. At only a single point, the war dog leaves a lot of room for expansion. Let's look at making a 15 point starter list.

As a Guard Dog, Fluffy here gives the warcaster he is attached to +2 DEF vs melee attacks.  Let's capitalize on this by choosing a warcaster with an already high defense, pSorcha.  With Wind Rush she's usually running around at defense 18.  Fluffy puts her to DEF 20 vs melee, making her almost impossible for anyone to hit without access to boosted attack rolls.

Next I'm going to add a unit of Widowmakers, one of pSorcha's favorite units due to the synergy between her Fog of War spell and they Camouflage ability.  These snipers can knock off the last couple points on a column or spiral, hunt solos and kill low arm infantry.

Next up is a unit of Doom Reavers.  These help solve the problem I normally see in low point games, which is that the alpha strike can be totally devastating.  When you're only running one or two warjacks your opponent can completely cripple you by getting the first charge.  Solve this problem by keeping the doom reavers spread out.  Two or three range in front as buffers and the rest stand just back for the countercharge.  Just remember that as abominations you need to keep them away from your widowmakers and guard dog.

This leaves us with 9 points and Khador is just spoiled for 9 point jack choices.  I'm going with a Devastator.  Its ridiculously high armor value is another component to being able to absorbe an alpha strike, and it can hit hard on the charge with its POW 18 rain of death attack followed up by two POW 16 fists (which can auto-hit on the feat turn).  Another fine choice would be to use a 7 point Juggernaut and put a greylord escort in with the doom reavers if you're worried about their berserk ability getting out of hand.

So our list looks like this:
  • pSorcha
    • War Dog Attachment
    • Devastator
  • Doom Reavers
  • Widowmakers
This list gives you a good number of models on the table (13), an even more difficult to hit pSorcha than usual and a large number of powerful attacks on your warcaster's feat turn.